
Clean, fresh food and a tidy home play a vital role in maintaining a healthy, disease-free lifestyle. This is why we strive to keep every corner of the house clean and ensure our cooking remains hygienic. For those who cannot go to the market every day and rely heavily on the refrigerator, keeping it clean and odor-free is an essential task. Let’s look at how to clean each part of your fridge.
Toss It Out
The first step is to throw away anything you no longer need. Don't hesitate to toss out expired food, mystery items that have been there forever, half-eaten snacks you won't finish, and unnecessary clutter. Food kept for too long can grow mold, which can then spread to the fridge itself, so don't forget to regularly discard expired items. Once the junk is in the bin, take everything else out of the fridge so we can begin cleaning.
The Freezer Compartment
Because the freezer is the coldest part, ice often builds up on the walls and floor. Do not scrape this ice with metal objects like knives or spoons and avoid pouring water or blowing fans on it. The easiest way to defrost is to turn off the power and unplug the fridge; once the temperature rises, the ice will melt naturally. Using a sponge to soak up the melting water will prevent a mess on the floor and help it dry faster. (Note: some modern refrigerators have an automatic defrost system).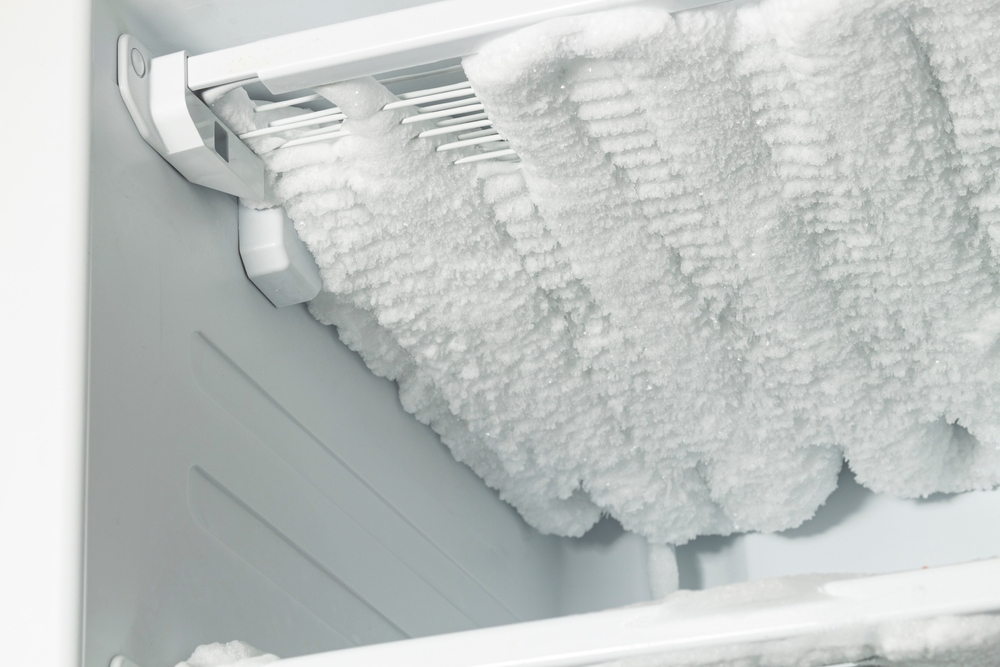
Interior and Exterior Body
Once the power is off, remove all detachable drawers, shelves, and glass plates. Start by wiping away crumbs and debris. Mix three parts water with one part vinegar (or three parts water with one part baking soda) and scrub the interior with a sponge or cloth. Apply extra pressure to remove dark spots and stains. For the exterior, dust it off first. You can also clean the door with the vinegar solution. Pay special attention to the area around the door handle, as it tends to get the dirtiest.
Door Liners (Gaskets)
The rubber seals (liners) on the fridge door are prone to mold, so scrub between them carefully. Wipe them dry with an absorbent cloth afterward. If these liners are torn or no longer stick, the door won't seal properly, causing the fridge to lose its cooling efficiency. Since dust and mold often hide in these gaps, this is a part that needs frequent cleaning.
Condenser Coils
Depending on the model, these coils are located either at the back or the bottom front. If they have a cover, remove it first. Dust tends to accumulate heavily here; use a vacuum cleaner if you have one. If not, a feather duster or a rag will work fine to shake off the dust. Be careful, as the coils can be hot to the touch.
Shelves and Accessories
Once the main body is clean, wash the removed shelves and drawers with dish soap. Focus on the corners and edges where stains often hide. Wipe them dry with a cloth. Reinstall the dry shelves, plug the unit back in, and let it run for about 30 minutes to get cold before putting the food back in.
Getting Rid of Bad Odors
- To keep your fridge smelling fresh, try these simple home remedies:
- Baking Soda: Place an open bowl of baking soda in the smelly section. It will absorb odors within 24 hours.
- Coffee Grounds: Coffee is powerful at absorbing smells. Place grounds in a cup or wrap them in thin paper to leave a pleasant coffee scent.
- Lemon: When life gives you lemons, use them to fight fridge odors! Placing a halved lemon on a small plate is the easiest way. Some also soak cotton balls in lemon juice to wipe down the interior walls.
Beyond making the appliance last longer, keeping a fridge clean and odorless is vital. It is a key part of the kitchen and the foundation of healthy meals. Don't skip it. Use these easy methods to clear your fridge today!


Comments